
Crafty
Minecraft is one of the games from my childhood that I spent weeks playing and daydreaming about. Being the more "technically savvy" of my friends, I was always the one set to host the Minecraft servers for us whenever we would want to play together. Today, setting up a Minecraft server is not as daunting as the days of yore, you can setup and start playing on your Minecraft server in about 10-15 minutes now-a-days.
Crafty is a Minecraft server management tool that allows you to host and manage all your Minecraft servers in one place. Setting up a server once you get Crafty setup is really easy, so lets setup a Crafty server now.
services:
    crafty:
        container_name: crafty
        image: registry.gitlab.com/crafty-controller/crafty-4:latest
        restart: always
        environment:
            - TZ=Etc/UTC
        ports:
            - "8443:8443" # HTTPS
            - "8123:8123" # DYNMAP
            - "19132:19132/udp" # BEDROCK
            - "25500-25600:25500-25600" # MC SERV PORT RANGE
        volumes:
            - /DATA/AppData/crafty/backups:/crafty/backups
            - /DATA/AppData/crafty/config:/crafty/app/config
            - /DATA/AppData/crafty/logs:/crafty/logs
            - /DATA/AppData/crafty/servers:/crafty/servers
            - /DATA/AppData/crafty/import:/crafty/import
This will allow us to have Crafty run on our docker hosts using a similar configuration as the rest of our containers. After we launch Crafty, we can find the login credentials in our Crafty volume. We will use that to login and then create a new server.
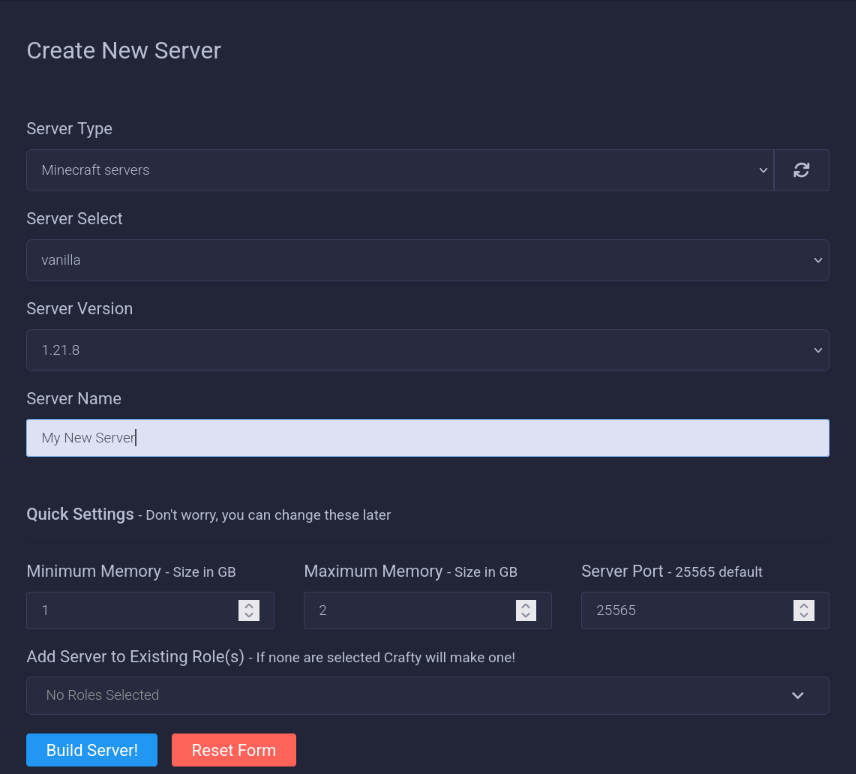
Once you build the server it will download the needed server files for your version and create an entry. You can now start your server and you're done!
Now, if you want your friends to be able to connect via a url instead of giving them your IP and port we will need to involve Caddy. If you already have Caddy installed you will just need to update your Caddyfile. My network runs Anubis between two instances of Caddy so we will be updating both Caddyfile's. Below is the config I set in each Caddyfile with my Anubis server.
#Caddyfile-tls
your-domain.com {
  reverse_proxy anubis:8081 {
    header_up X-Real-Ip {remote_host}
    header_up X-Http-Version {http.request.proto}
  }
}
#Caddyfile-notls
@craft {
  header X-Forwarded-Host your-domain.com
}
handle @craft {
  reverse_proxy craft-ip:port
}
If you only have Caddy directing traffic, the following Caddy config is all that needs to be set.
#Caddyfile-tls
your-domain.com {
  reverse_proxy craft-ip:port
}
Once you have configured your Caddy instance and restarted it with the new config, you should be able to connect to your Minecraft server and play with your friends!