
Upgrading the PlayStation Vita
During a recent trip I ended up breaking the screen of my PlayStation Vita (PSV). While I was a bit disappointed I knew replacement screens went for about $30 and could be easily bought from Amazon. Getting home and replacing the screen, I come to find out my left stick was permanently stuck in the North-East direction. Disassembling and cleaning it proved to be a lost cause. Looking online I realized buying a refurbished set of thumb-sticks were about the price of a new console...
Some people online did have success replacing their Vita thumb-sticks with Joy-Con sticks; all that is needed is a 5-pin FPC board and some magnet wire! A set of Hall-Effect Joy-Con sticks cost $12 opposed to the $60-$80 price tag of the original sticks. Even better, the stick click could be modded to stand-in for another button, if one had the desire. I decided to go all out with the mods and included Nintendo Switch Speakers to install onto the device for better sound quality.
Replacing the Joy Stick
This mod ended up being a pain due to my magnet wire and lack of proper tools. While it can be done with just a soldering iron, solder, some flux and kapton tape. A Youtuber made a video showing how they went about doing this mod with a larger 5-pin FPC breakout board. Another user I found on GBAtemp used a breakout board from 4Layertech. It could be done, and easily! Just not many people have made guides on their process. Both examples I have found use either a US console or an different model PSV from mine, but the pads are easy to find. The pads are very similarly placed on all versions of the daughter-boards, so if you have some electronics knowledge it should be easy for you to infer. Since I had the larger 5-pin FPC available to me, I decided to mod it now and replace it with the smaller board later down the line.

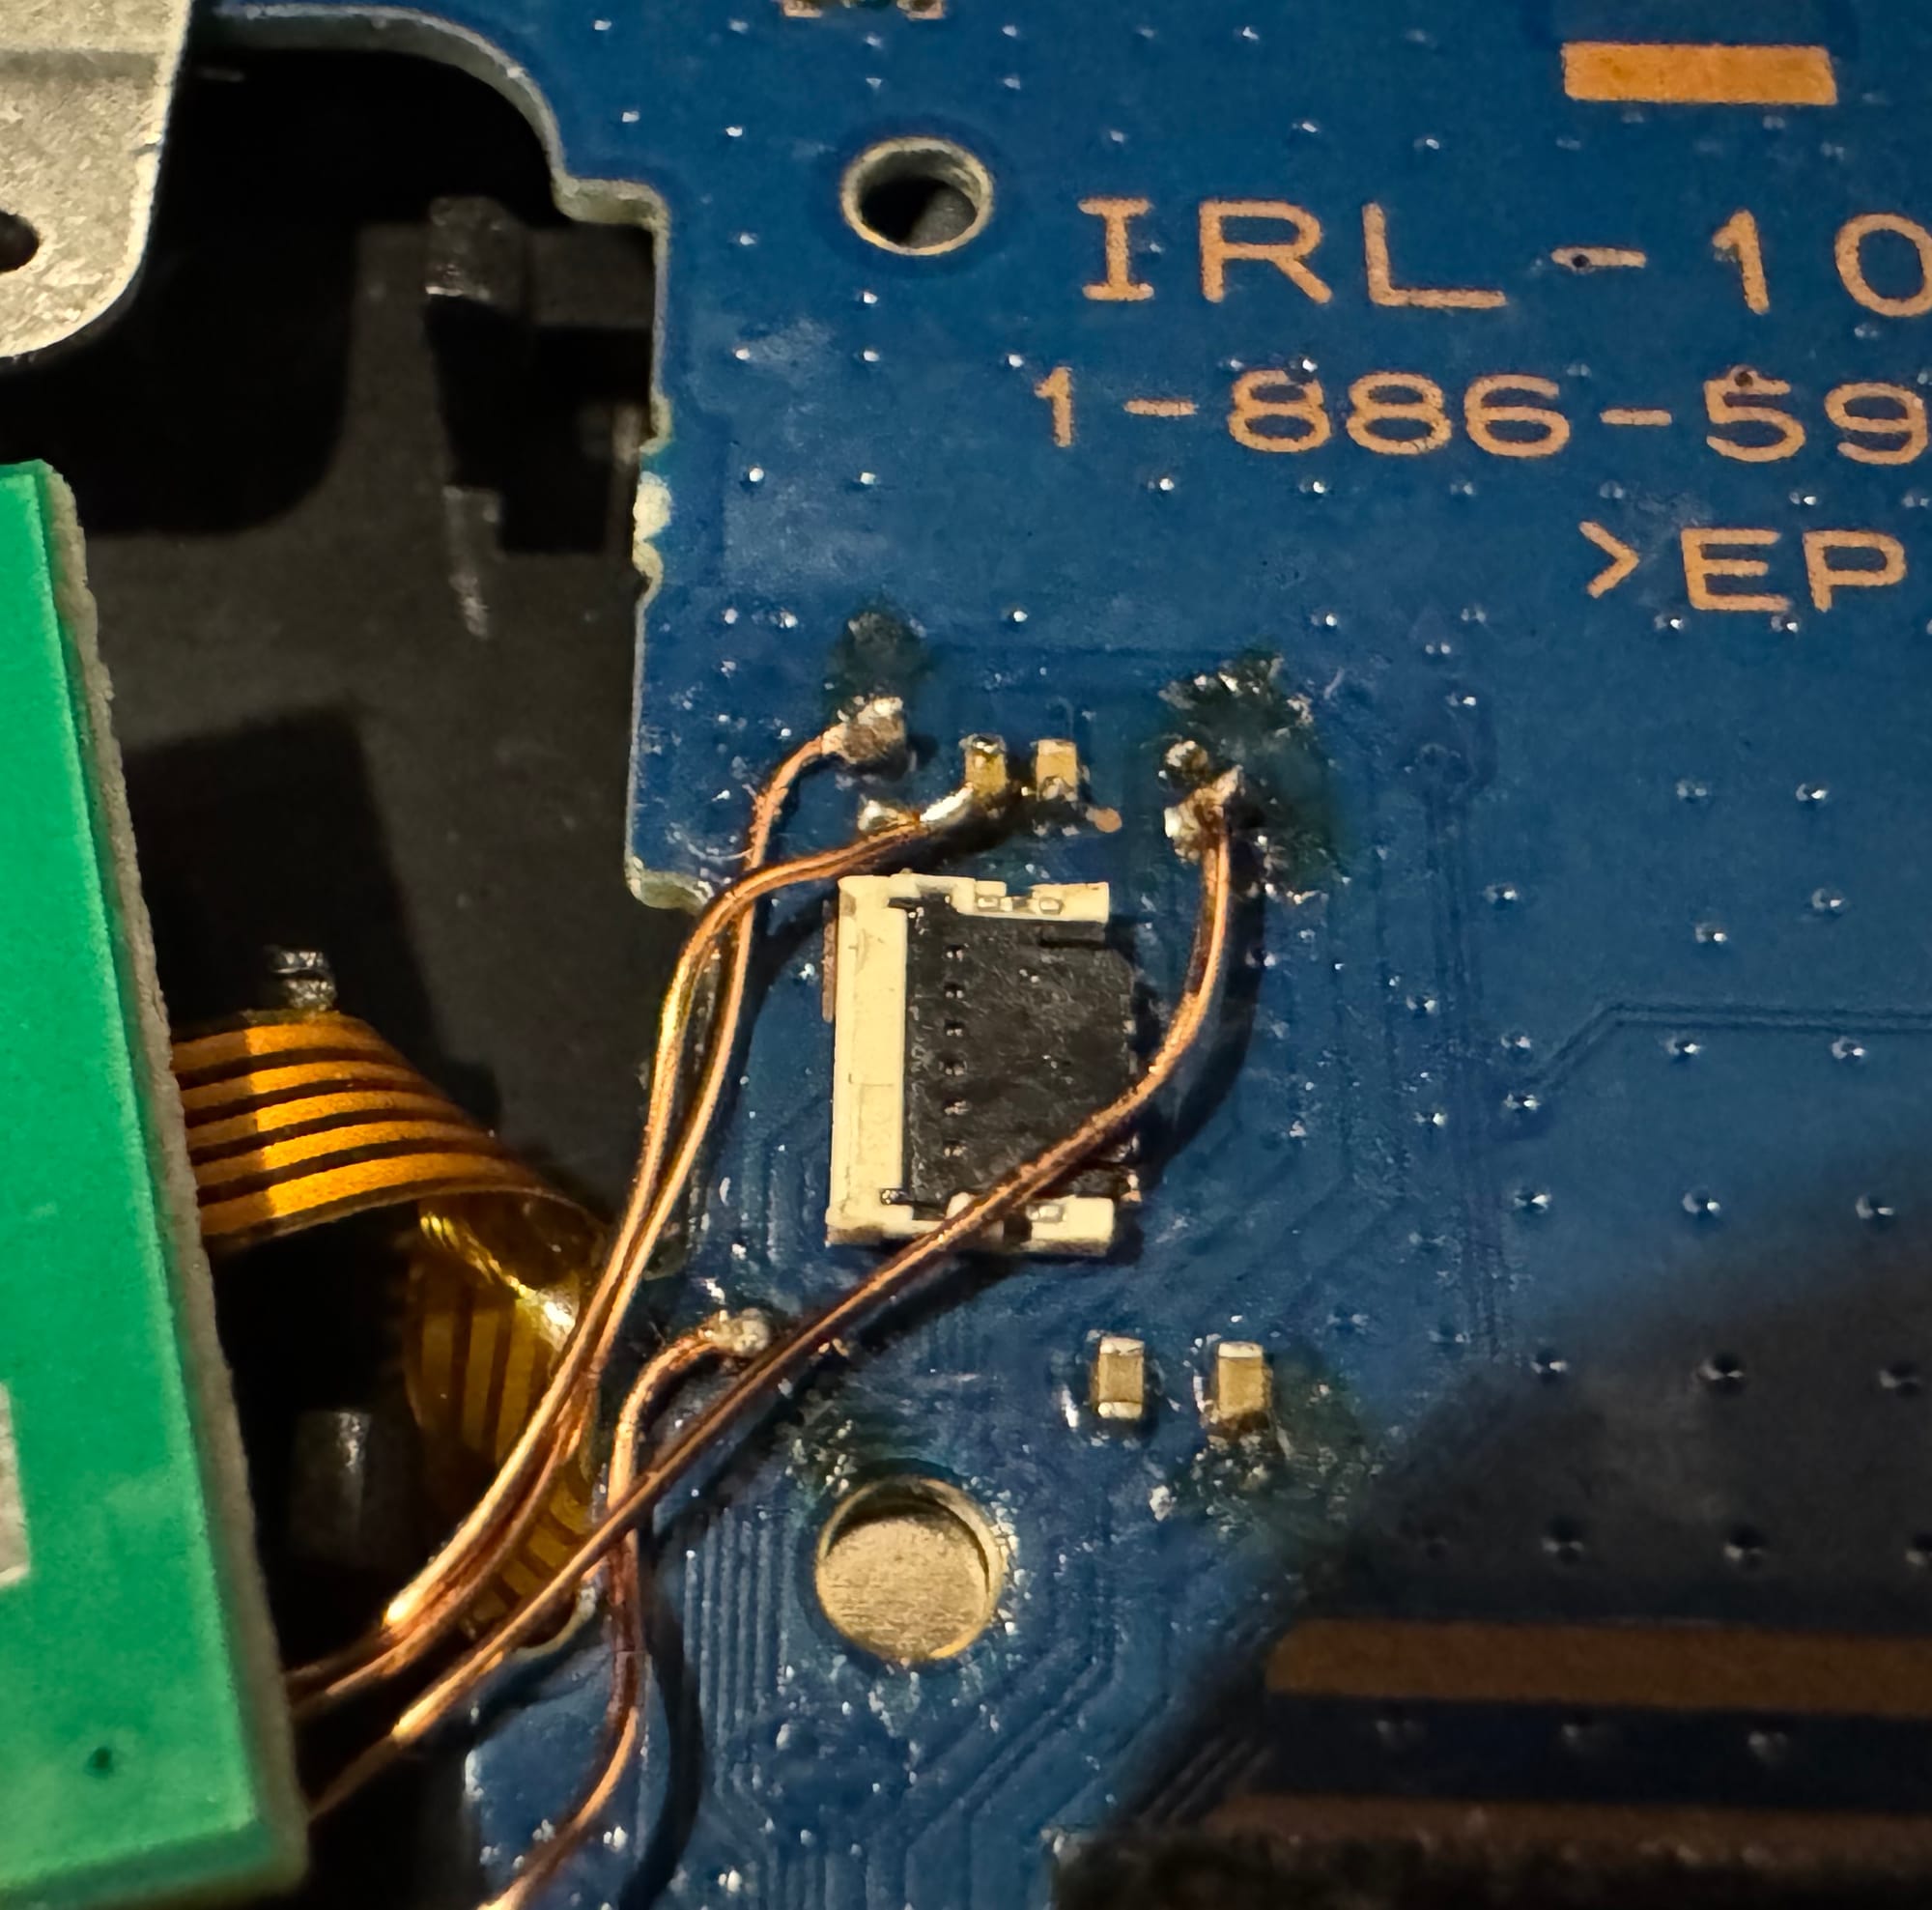
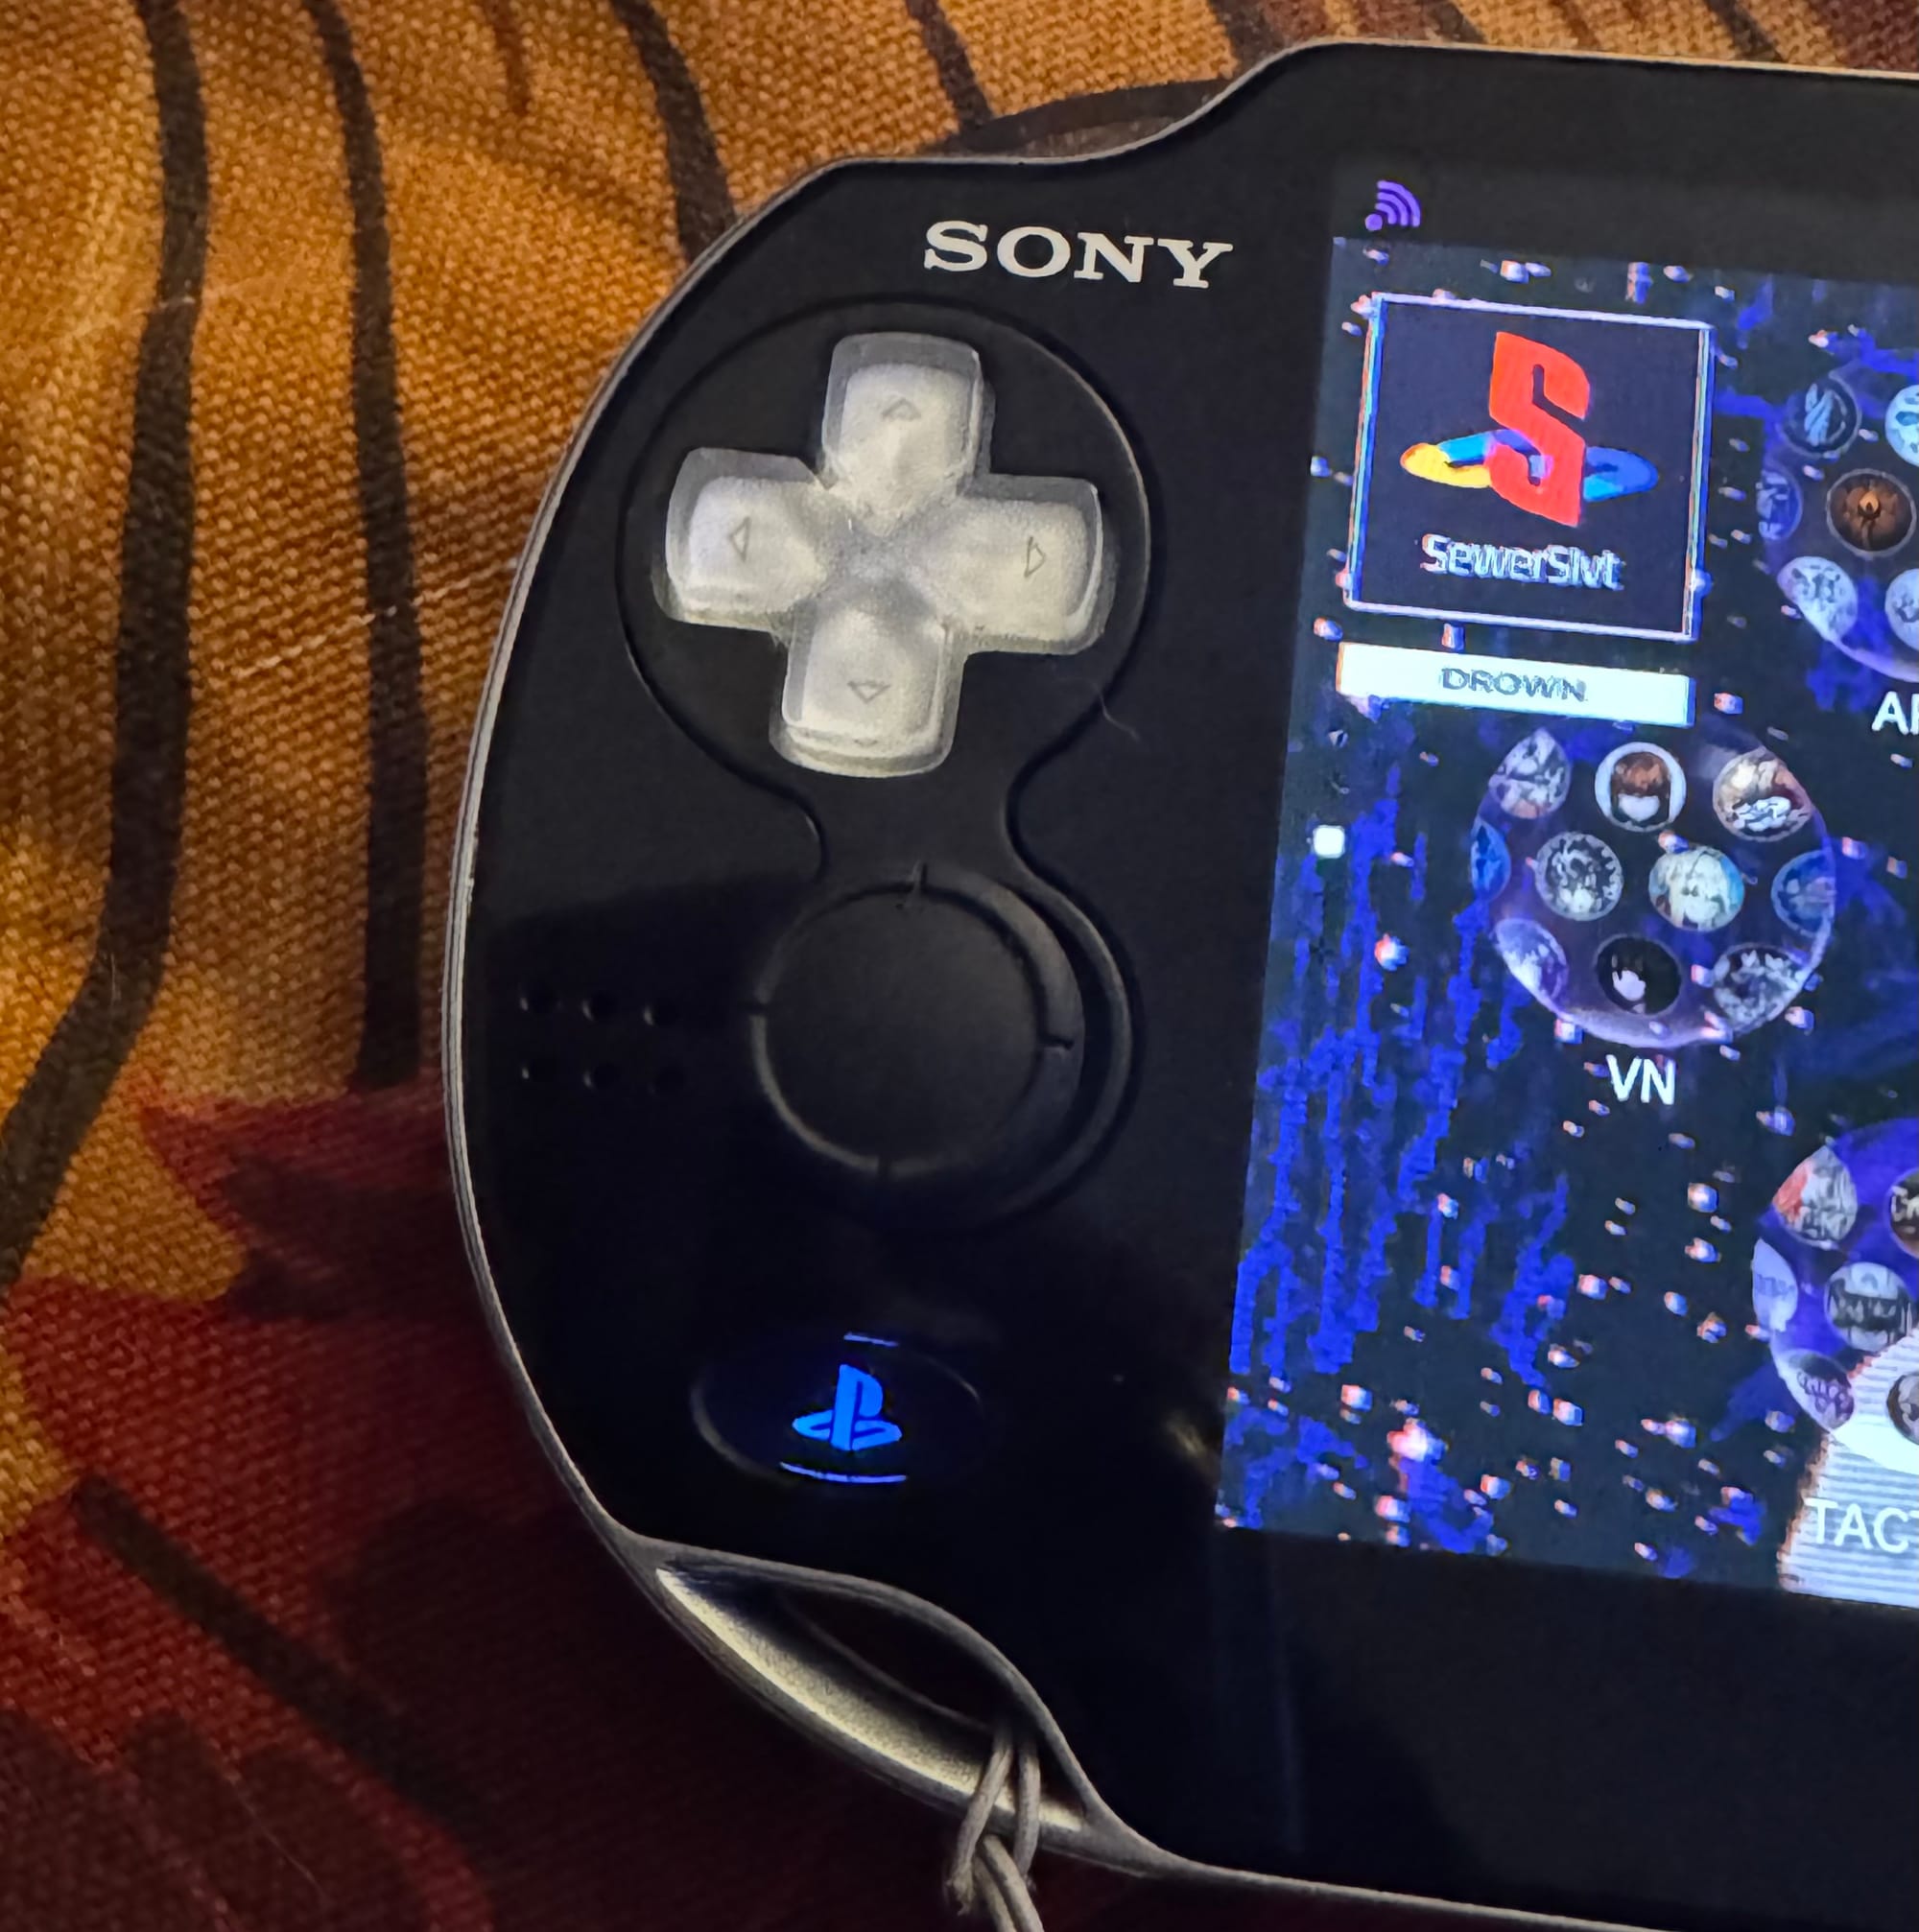
(Ignoring my solder job; helping hands and electronic microscope were not with me when I was working in my studio!) The mod is just four points on the daughter-board and you connect it all up to the FPC board. Once it was all soldered, I applied some kapton tape and aligned it the best I could to get it to fit in the case. You can test it and make sure that the console recognized the stick and doesn't exhibit any odd behavior. Since the pads were so small, mine had a tendency of coming off, especially for the Vcc line.
Upgrading the Audio
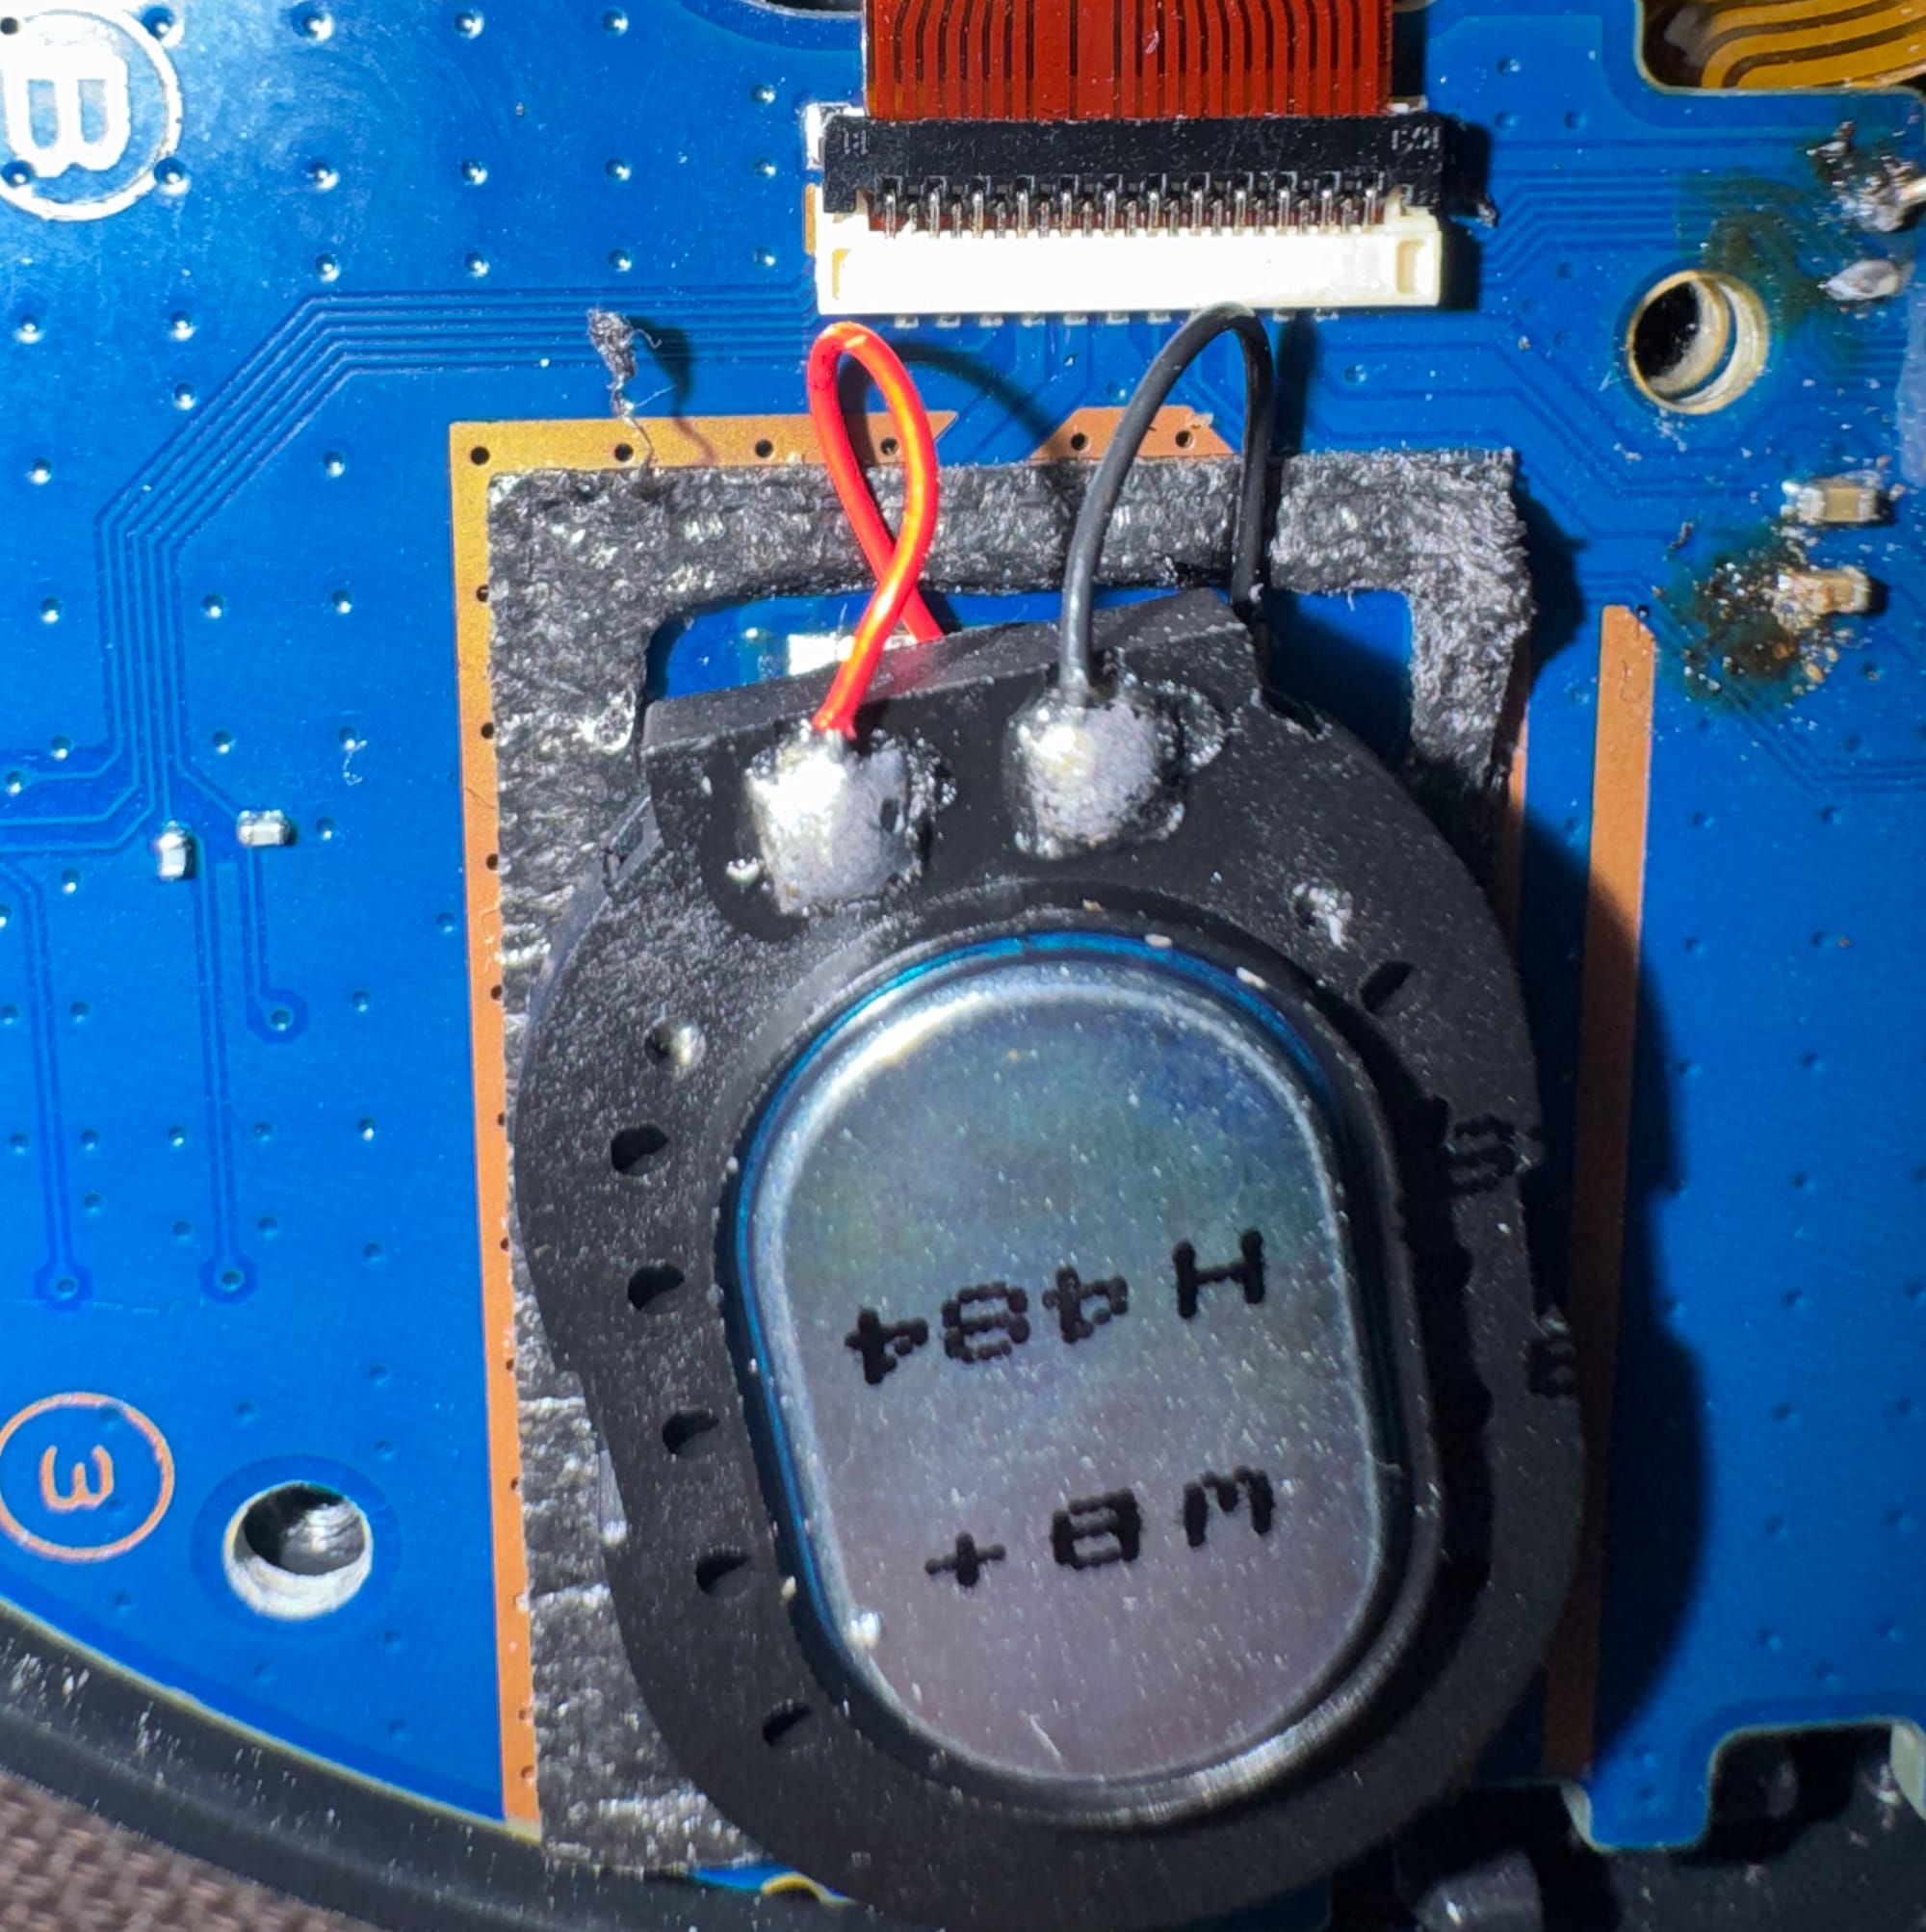
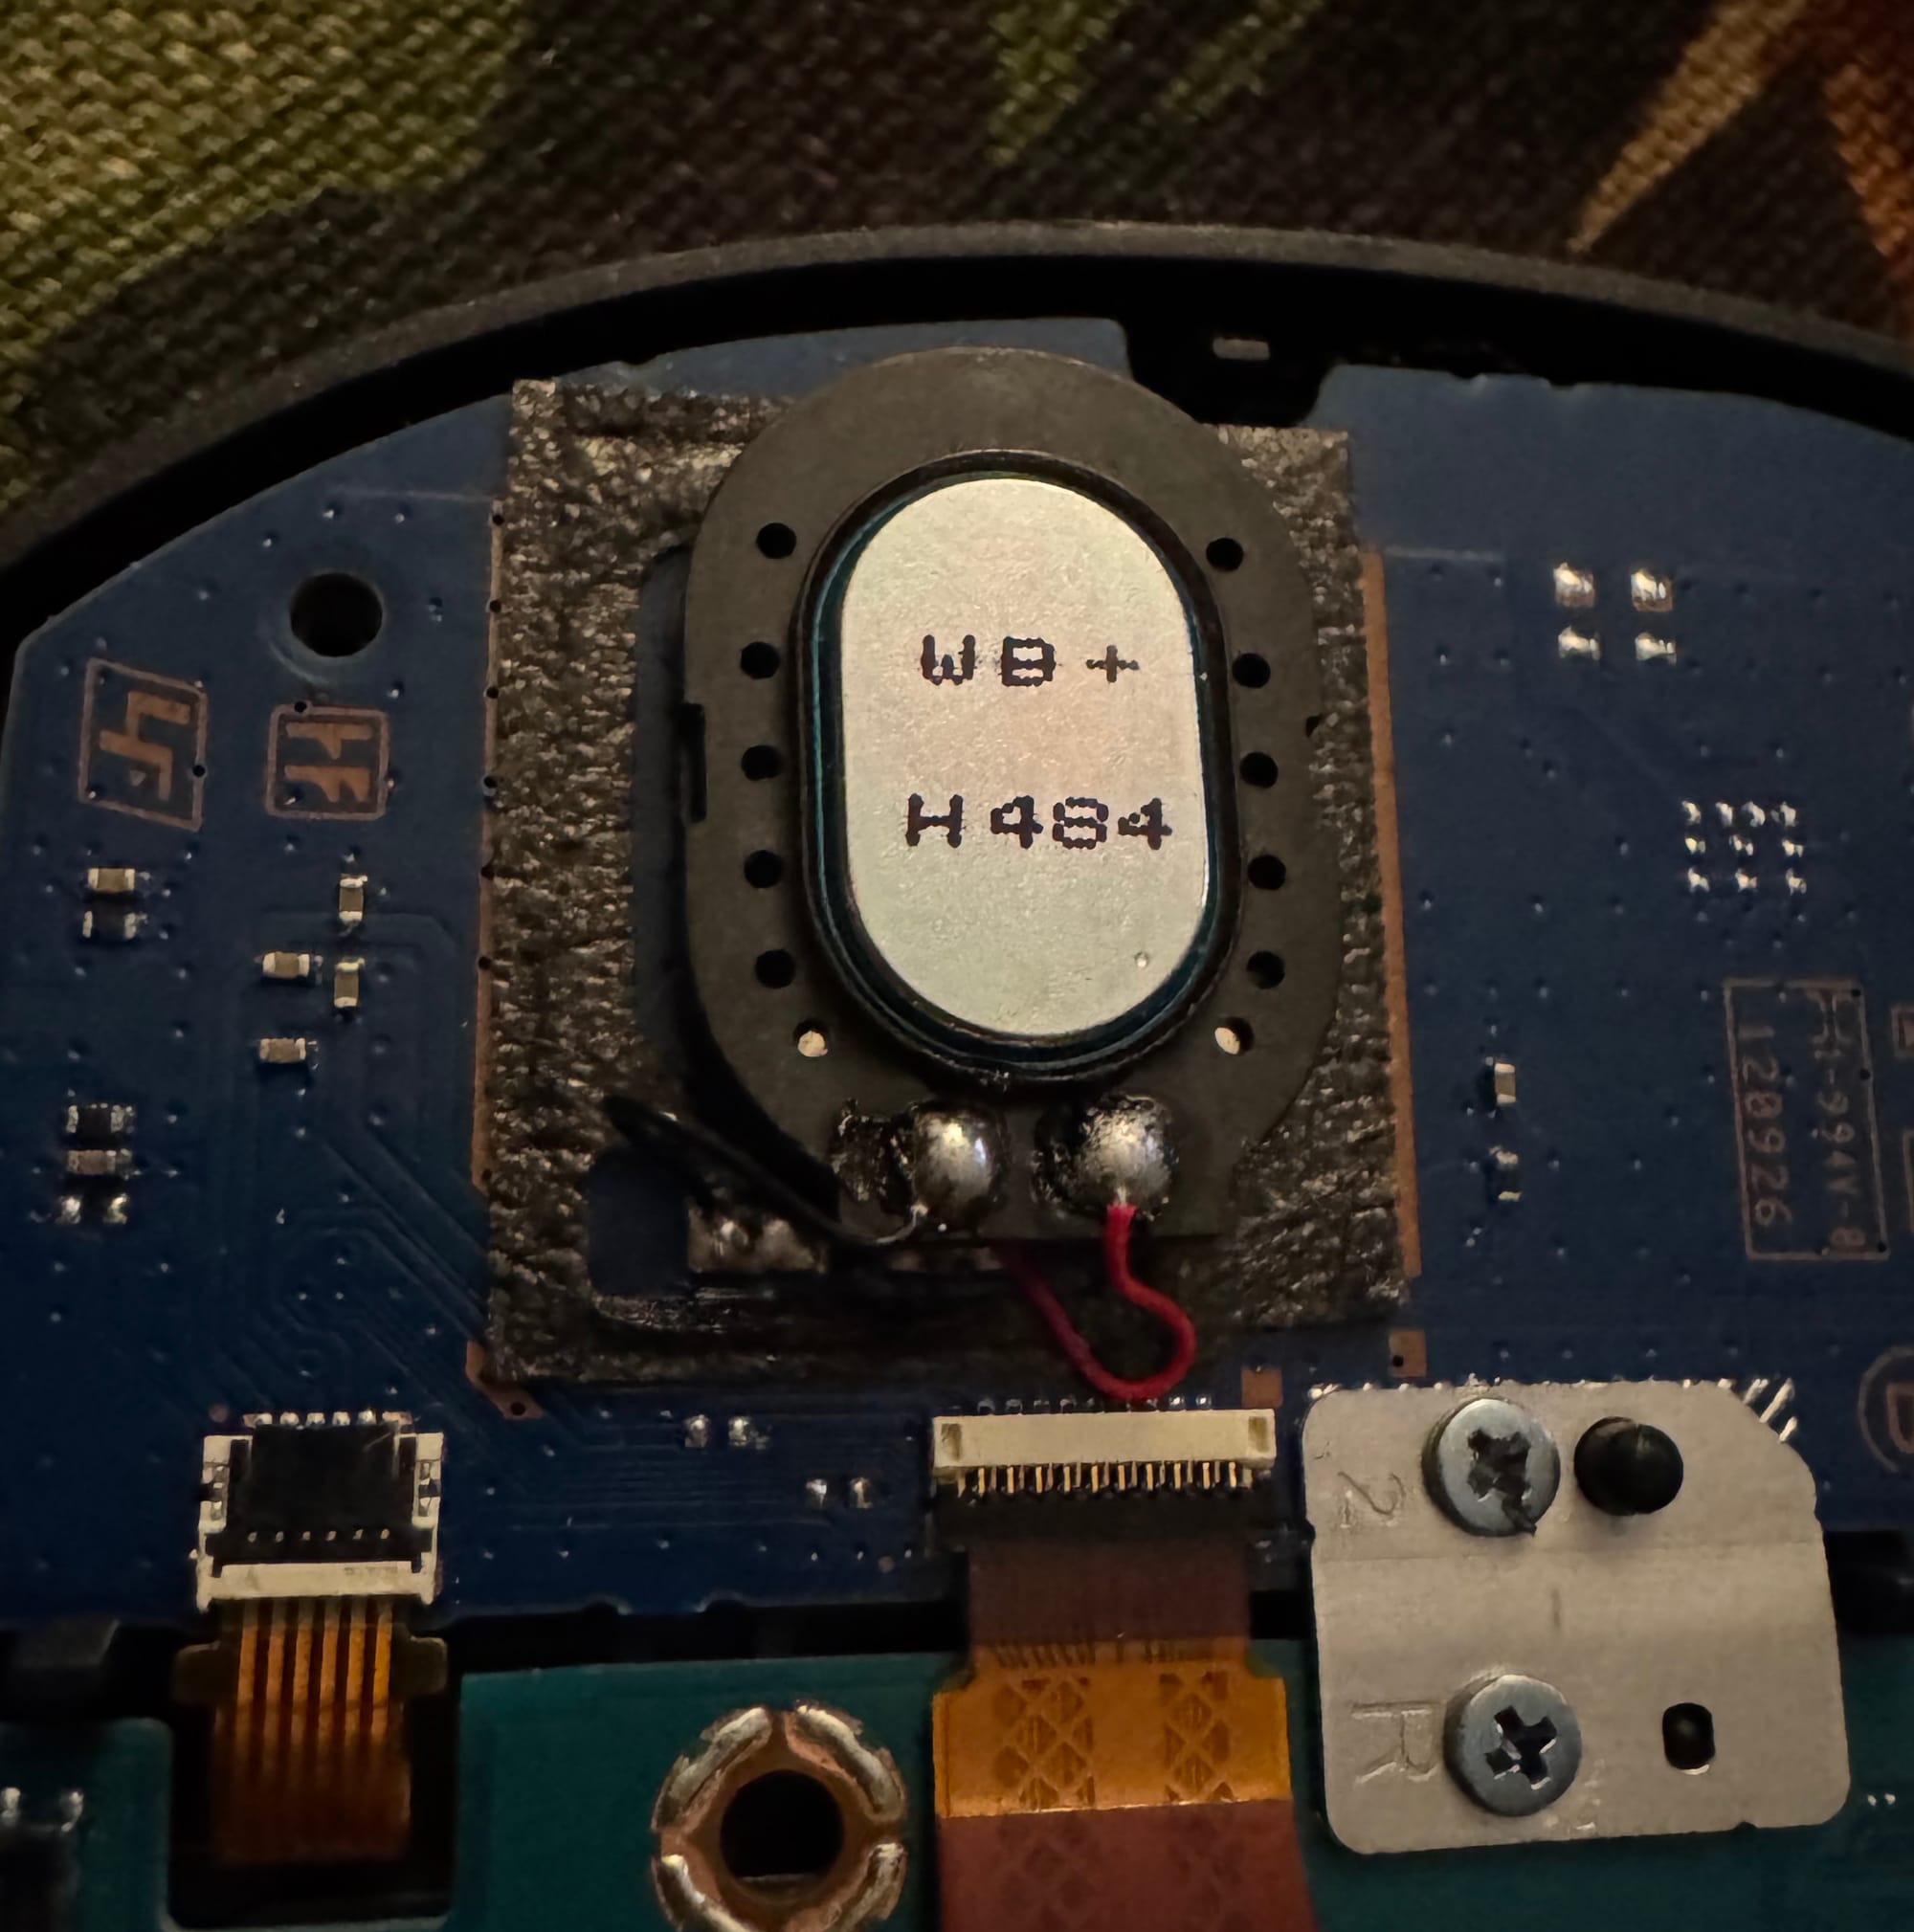
Audio for the device was pretty straight forward. The speakers that come with the PSV feel a bit tin-ny and not too loud. The Switch speakers on the other hand are MUCH louder and better sounding for the size. I saw other users online make their own frankenstein audio mods. From Mac speakers to Nintendo Switch 2 speakers, many things have been tried to improve the sound quality of the Vita. Soldering the speakers is an easy job to do. The hardest part of the job is cutting out the plastic from the back cover to make room for the speakers. After they were soldered I tested the console and you could instantly heard a difference in the sound quality and the loudness of the device.
If you are looking to use other speakers, make sure to do some research as you could damage your speaker or the amplifier on the device if you use something rated too low or high. I honestly did not check since other people have done this same mod before and I ordered and additional set of speakers that were quite smaller than the Switch speakers. I tested those and the Switch speakers and felt that the Nintendo Switch speakers was louder than the other speaker I bought; which could have been due to their size differences. The benefit of the other speaker is it did not require any modification to the back cover, which may be ideal to some people for the small audio trade-off. The smaller speakers were still leagues better than the stock Vita speakers.
Music and games now will be more enjoyable using the speakers instead of having to rely on my wired headphones or the limited battery of my wireless earbuds. I have a Switch Lite that I modded a while ago with PicoFly and use quite a bit, so I am happy now that my Vita will sound just as good as that device does.
Final Result
While the stick is a little off-center if you decide to make no adjustment to the OLED frame, it honestly does not get in the way much with the D-pad. I really like the asymmetrical look and practicality of the sticks. I have seen some people who have done this mod report that they had issues pressing the face buttons because the right stick would get in the way. When the time comes the same will be done to it, but it's perfect as is for now.
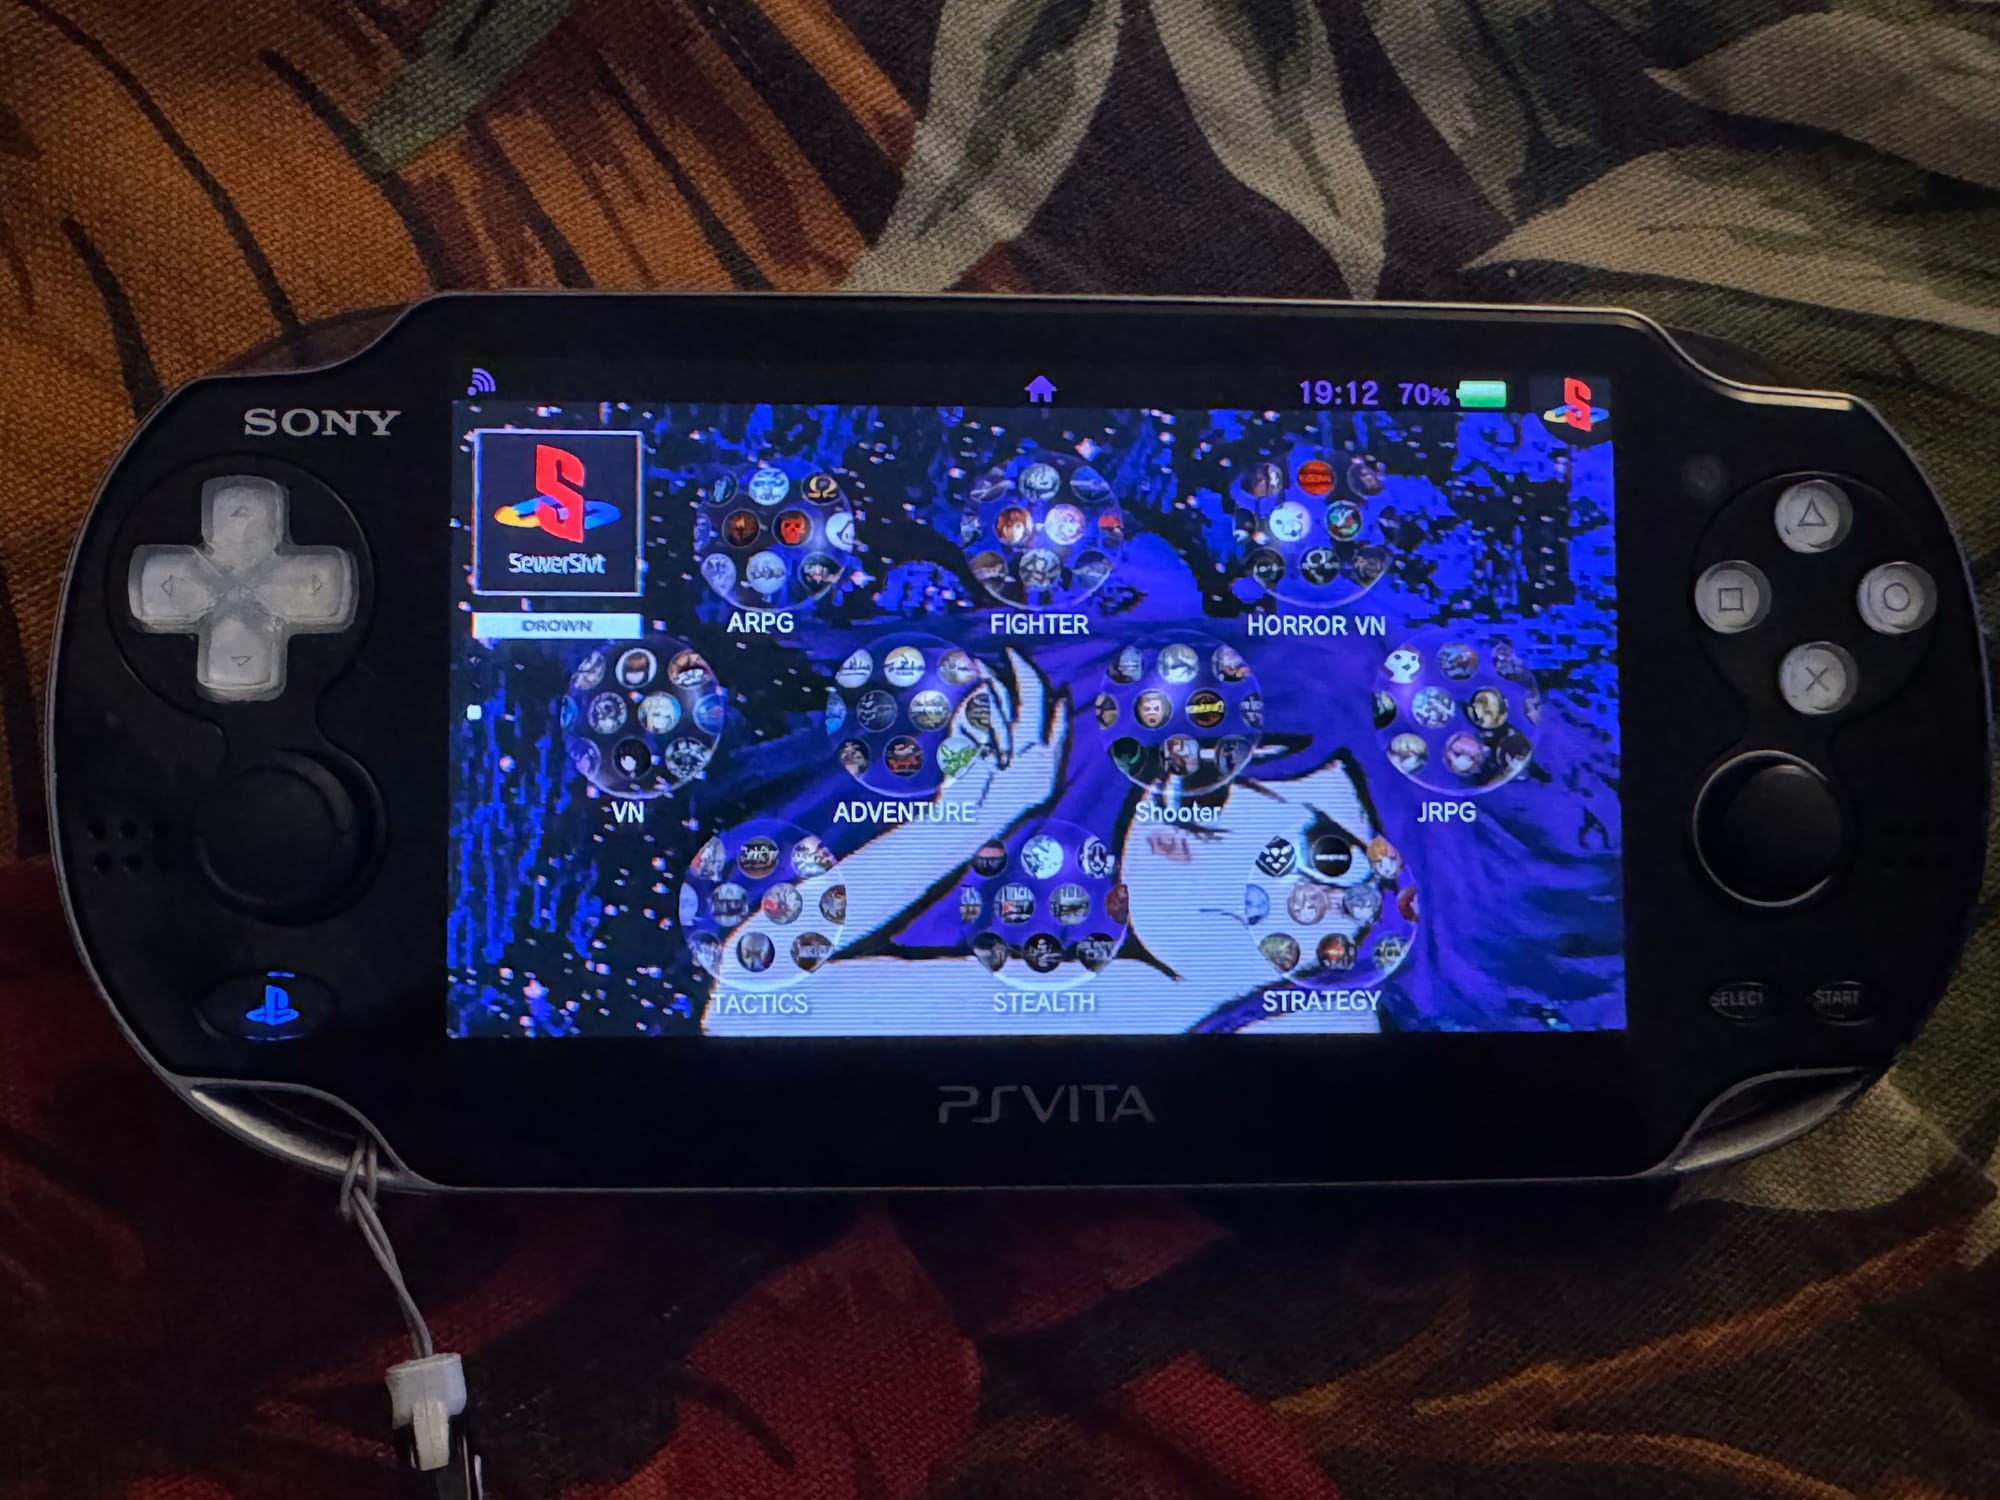
The entire modding process did not take as long as I expected and now my broken Vita was given second life! No need to care about replacement sticks for the Vita when I can buy two Switch ones for 1/8th of the price. The sound quality of the speakers after replacement are also much better and well worth the upgrade.
Joy-Con Stick Mod Instructions
- Turn off the device.
- Unscrew back cover and remove it, unplugging the battery and touch-pad.
- Unscrew and disconnect everything from the right-hand (left-stick) board, remove it from the console.
- Prep your FPC breakout board and the PSV daughter-board, solder 4 wires for X, Y, Vcc and ground from from the pads near the original connector. Result should look similar to above if using Special Edition Japanese Vita.
- Connect your Joy-Con stick to the FPC, re-assemble the vita enough to test/power it on. Verify that it works, the Y axis will be inverted most likely.
- Using "Autoplugin II" install reVita and restart your Vita.
- Launch reVita using square + start, create a new remapping. Remap up to down, etc. then save the profile as a global default.
- You should now have working Switch Joy-Con stick's in your PlayStation Vita!
Switch Speaker Mod Instructions
- Turn off the device.
- Unscrew back cover and remove it, unplugging the battery and touch-pad.
- Solder the speakers to the speaker pads on each of the daughter-boards.
- Cut the plastic from the back cover where the speakers used to be
- Re-assemble the vita enough to test/power it on. Verify that they work.